How to Travel Without Leaving Your Home
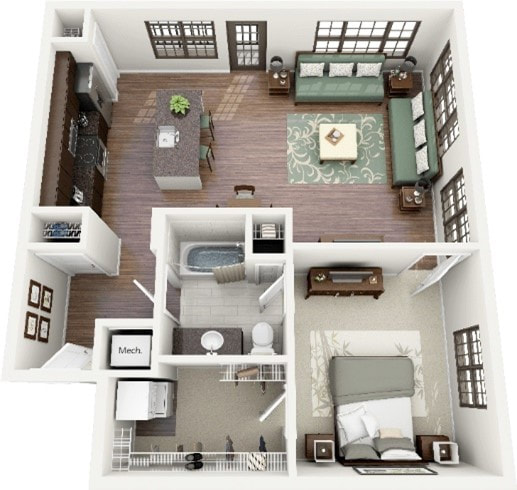
Other than going to other family members’ houses or appointments, you probably spend a lot of time at home with your child who is blind or visually impaired. That is the best place for early learning to occur. Your typical day moves from one routine to another – bathing, dressing, mealtime, playtime, napping, and bedtime.
As your child becomes more mobile, their movement becomes more purposeful as they go from one activity to the next. The better understanding your child has of location and travel concepts, the better equipped they will be to navigate your home with confidence.
Whether a babe in arms, a toddler, or a child who travels using a stroller or wheelchair, you and your child will form a traveling team to explore your house and discover important landmarks along the way.
|

Duration
This activity may take 15 to 45 minutes or more depending on your child.
Materials Required
The materials you’ll need for this activity depend on how mobile your child is.
|
Definitions
Before we get started there are a few important O&M concepts to explore: travel route, landmarks, clues, and edges.
“Landmarks” and “clues” are things which help your child recognize where they are in space. Landmarks are permanent, fixed, and easily recognizable to your child. An example of a landmark could be the shag carpet located in your family room or the refrigerator that hums in your kitchen. A clue, on the other hand, is not a permanent fixture in your home but is very helpful when available. An example of a clue is the delicious smell coming from your kitchen when you cook dinner or bake cookies. The smell of cooking can help guide your child towards the kitchen but may only offer a clue during mealtimes.
Take note of the clues and landmarks that can give your child important information about their whereabouts. These can be sounds, smells, objects your child can touch, and things they can see (e.g., the sound and smell of a coffee maker in the kitchen, grandma’s picture on the hallway, the refrigerator handle in the kitchen). Another great strategy for helping your child identify where they are in space is to encourage them to identify the “edges” of each room by searching for landmarks and clues such as windows, pictures on the wall, or appliances. Children who are blind or visually impaired experience places best if they travel the perimeter first, and then feel more comfortable with the less structured, emptier spaces in the middle. By traveling the perimeter of a room in a thoughtful manner, you are helping your child learn to build a map of your home inside their head. This is a wonderful and important skill that they will use throughout their life to help identify where they are in space and to travel safely from one place to the next. |
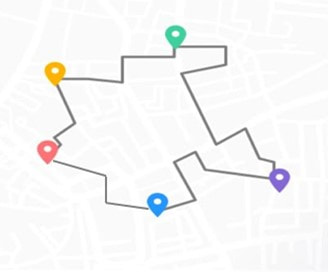
Plan a Route
|
Activity Steps
1. Create a cue for starting your route so that your child will associate the cue with this activity. This could be your child’s cane or a pre-cane, or for a child who isn’t using a cane yet, a wooden spoon to tap surfaces with.
2. Place your child in their stroller or carry them in a Snuggly or in your arms. Your child should be able to use their hands or feet to touch different surfaces. 3. Start your trip by saying, “Where are we?” 4. Tap an object that is always present at the start of your route; this is what is referred to as a “landmark.” Then, you answer, “I am next to the doorbell.” Pause for 10 seconds to allow your child to process and perhaps respond. Although it might be hard for you as a parent to slow down, this strategy of “Wait Time” is just as critical for learning routes as the direct sensory exploration. 5. Label sounds as you find landmarks. You could say, “The refrigerator ‘hums.’” Feel how the vents blow air. “The doors go ‘clack clack’.” 6. Encourage your child to touch and hold the cane, but you can be the holder/user of the cane if they are not yet ready. You do not have to tap the cane during the whole route. You can tap it for exploration occasionally to model how it works. For the most part you’ll be using your hands as an exploration tool to create sounds on different surfaces. 7. Introduce tactile opportunities that are at your child’s level. Invite your child to touch the landmarks along the route. Use feet only or hand-under-hand to start. Allow your child to touch independently if they would like to, but don’t force it. 8. Next, you ask, “Where are we going? To the kitchen!” This is usually a room you would enter first after walking in your home. 9. Then, you say, “How do we get there?” First, you might find the coat rack on the wall. Walk to the coat rack. Position your child near the landmark and allow the child to touch the landmark with their hands or feet. 10. Talk about what you find along the way. Narrate what happens as you travel your route but use minimal words to allow for more listening of environmental cues and cognitive processing. 11. As you travel, use directional words in relation to your body and/ or your child’s body. “The window is on my right. The ceiling fan is above your head. The entry mat is below my feet.” 12. Repeat the O&M process at each landmark as you travel a predictable route.
13. End the activity with a consistent “all-done-with-travel-time” cue. You could say, “We’re all done with travel time. We walked from the front door to the kitchen and back to where we started.” If you used a cane or pre-cane, return it to its original location, often in a corner by the front door or on a hook by the front door. |
Travel Considerations
|
Additional Sensory Opportunities
|
Introducing New Routes
|
Extension Activities
|